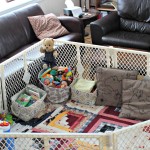
Hint Mama contributor Olivia Howell, whose home doesn’t have an extra room for a playroom, recently shared how she created a play space for her son within her living room with the help of baby gates, a blanket and lots of creativity.
I can relate to Olivia’s struggle to create a designated play area within a small living space. In an ideal world, my 2-year-old daughter wouldn’t just have a bedroom. She’d also have a playroom where she, and any future siblings, could play and where we could store toys.
However, we live in a city where space is an expensive luxury. So, instead of an entire room devoted to toys, my daughter has a contained play space we created for her using a variation of Olivia’s hint. Today’s hint covers my approach, along with four other create-a-“playroom” strategies to consider if you don’t have a room for an actual playroom.
1. Go for a playroom nook. In other words, consider transforming a small space within a larger room into a “playroom.” Ideally, the space should have some sort of natural separation from the larger room, like a low wall or stair, but strategically placed book cases, toy storage or baby gates (as Olivia pointed out) should work just as well at separating off the space too. In fact, as Lauren Deneroff, writes over at Mama Love NYC, turning a corner of a room into a play space with the help of a rug designating the play nook’s borders works well too.
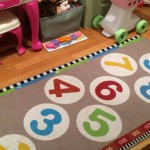
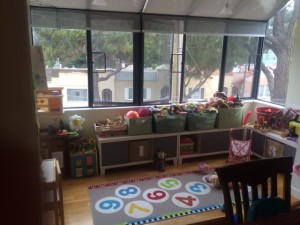 The nook approach is my method of choice: My daughter’s “playroom” is a small, raised nook off of our dining room. The small space used to be a balcony until our home’s previous owners closed it up and made it part of the house. The nook is the perfect size for a toy kitchen, a little table, a cute rug, storage bins filled with toys and cabinets we recently bought on sale from Land of Nod (see my daughter’s play nook in the image to the right).
2. Repurpose a closest. Even if you don’t have an extra room to transform into a playroom, there’s a good chance you may have a spare closet that you can repurpose into a contained play area.
Here’s a great example of Project Nursery of how one couple transformed the walk-in closet in their child’s nursery “into a mini playroom.” You also can find lots of inspiration for how to do this over at Pinterest, including how to turn a closet under the stairs into a DIY playroom.
And for those of you that are especially handy with tools, Parents Magazine shares how to “transform a little-used closet” into an elaborate closet play space. There’s also a variation of this idea covered over at Design Sponge: Turning the closet into the sleeping space and the bedroom itself into the playroom.
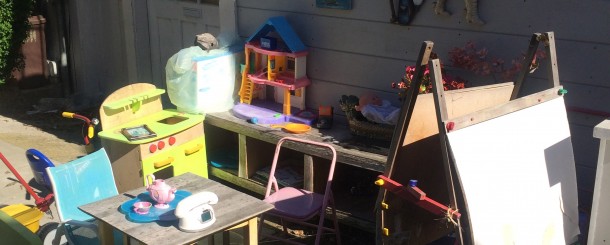
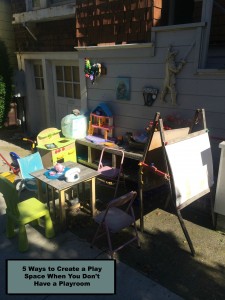 3. Consider an outside option. In my San Francisco neighborhood, there’s a house with another very creative playroom approach: The owners have transformed the front of their home into a play area, complete with an easel and a little table, as shown in the image to the left.
To be sure, this approach works best if you live in a warm climate, and you have to really trust your neighbors (or not care about the outside toys) to set up a playroom right next to the street.
Still, if you live somewhere warm or are willing to have a three-season solution, an outside play area is an option worth considering if you have enough outside (preferably backyard) space and toys that can withstand rain. And if you’re not comfortable putting toys right out in the open, a variation of this idea is setting up the play area in a little shed-type structure. Check out Apartment Therapy and BabyCenter for some more outside-playroom inspiration.
4. Transform a porch. Another variation of the idea above is to set up a playroom on your porch, especially if you have one that is a three-season design, an idea inspired by the clever porch playroom Nell over at Whole Parenting Family created for her kids.
5. Create a garage playroom. If you have extra space in your garage or an unused garage, you could create a play space in a designated spot within the garage (for safety reasons, you’ll want to make sure the play area is separated from where your cars go, of course). I’ve seen a number of such play nooks here in San Francisco, and for inspiration, check out advice on the subject from The Dollar Stretcher and pictures of garage-playroom transformations over at Elizabeth Street, The Voice of Adventure and Apartment Therapy.
Of course, some of the ideas above work better than others for young children. We like our inside nook approach because we can see our little one from wherever we are in our home’s relatively open downstairs floor plan. An outside playroom not easily visible from inside your home likely works best for older children that can play alone.
Finally, all of these small play area approaches have one downside: it’s easy for toy collections to outgrow the small spaces. For instance, blogger Maddycakes Muse writes that her daughter’s storage closet playroom worked great until her daughter turned 2.5 years old and her many toys no longer all fit in the closet. For this reason, it’s a good idea to also engage in some sort of toy rotation.
Still, if you live in a relatively small home like I do, the approaches above are at least worth trying in an effort to keep toys from overrunning your house.
How have you created a contained play space if your home doesn’t have a designated playroom? Share your DIY playroom tips below.
Follow Hint Mama on Facebook and Twitter, and read more about her and her disclosures.



Great tips here. We actually did the garage playroom. Thanks for sharing on Merry Monday. Hope to see you again on Sunday at 6pm PST.
You are so kind to share my tip! I love your blog–so many helpful thoughts!